
Ebook Info
- Published: 2008
- Number of pages: 240 pages
- Format: PDF
- File Size: 21.25 MB
- Authors: David Pearl
Description
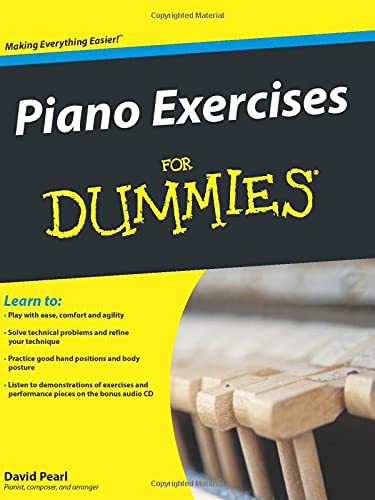
The ideal hands-on reference for piano students who want to strengthen their skills and refine their technique–and the perfect companion and next step to the bestselling Piano For Dummies. Note: CD-ROM/DVD and other supplementary materials are not included as part of eBook file.
User’s Reviews
Editorial Reviews: From the Inside Flap The fun and easy way to tune up your technique and improve your playingIs the piano your passion? This easy-to-read guide is bursting with fun exercises designed to hone your piano-playing technique, from warm-ups and major and minor scales to octaves, chord cadences, and more. You’ll play challenging rhythms, practice with different tempos, play a performance piece at the end of each chapter, and find inspiration for performing music your way.Warm up away from the piano — release tension in your hands, wrists, and arms and go to the piano feeling loose and comfortableWake up those fingers — perfect your hand position and develop left and right hand finger independenceDevelop greater control — practice smoother finger crossovers and pass-unders for speedier scales and arpeggiosIncorporate greater movement — play chords without tension, jump across the keyboard, and move with ease in parallel and contrary motionRamp up your skills — perfect your pedaling, play grace notes, trills, and other fancy ornamentsOpen the book and find:More than 150 exercises that vary in style, key, and tempoMajor and minor scalesBlues, diminished and chromatic scalesFinger, rhythm, and chord progression exercisesLeft-hand accompanimentpatternsPerformance pieces with every chapterTen one-page dance piecesBonus CD Includes More than 70 tracks all played by the author Selected exercises from each chapter Every performance piece Ten dance pieces from the book From the Back Cover The fun and easy way to tune up your technique and improve your playingIs the piano your passion? This easy-to-read guide is bursting with fun exercises designed to hone your piano-playing technique, from warm-ups and major and minor scales to octaves, chord cadences, and more. You’ll play challenging rhythms, practice with different tempos, play a performance piece at the end of each chapter, and find inspiration for performing music your way.Warm up away from the piano — release tension in your hands, wrists, and arms and go to the piano feeling loose and comfortableWake up those fingers — perfect your hand position and develop left and right hand finger independenceDevelop greater control — practice smoother finger crossovers and pass-unders for speedier scales and arpeggiosIncorporate greater movement — play chords without tension, jump across the keyboard, and move with ease in parallel and contrary motionRamp up your skills — perfect your pedaling, play grace notes, trills, and other fancy ornamentsOpen the book and find:More than 150 exercises that vary in style, key, and tempoMajor and minor scalesBlues, diminished and chromatic scalesFinger, rhythm, and chord progression exercisesLeft-hand accompanimentpatternsPerformance pieces with every chapterTen one-page dance piecesBonus CD Includes More than 70 tracks all played by the author Selected exercises from each chapter Every performance piece Ten dance pieces from the book About the Author David Pearl is the author of The Art of Steely Dan and Color Your Chords. His other books include Burt Bacharach Piano Solos, jazz transcriptions of artists such as Grover Washington, Jr. and Dave Douglas, and arrangements of jazz tunes, classical pieces, and opera arias for piano. He has taught piano and performed jazz and classical music professionally for more than 30 years. Excerpt. © Reprinted by permission. All rights reserved. Piano Exercises For DummiesBy David PearlJohn Wiley & SonsCopyright © 2009David PearlAll right reserved.ISBN: 978-0-470-38765-8Chapter OneGetting Ready to Practice In This Chapter * Warming up your body * Relaxing and stretching * Checking your posture at the piano * Moving at the piano Take a few minutes to warm up and relax your body before you start to practice. Many musicians find that stretches, yoga, the Alexander Technique, and exercise in general help the physical component of playing music by heightening awareness of their bodies and the way they move. After a few stretches and warm-ups, you can bring a relaxed awareness to the piano when you practice. The warm-ups in this chapter are designed to loosen and relax the areas piano players use the most: the fingers, hands, wrists, arms, shoulders, neck, back, and hips. Warming Up Away from the Instrument Why warm up away from the piano? Here are two reasons: To stretch and release muscles throughout your body from standing positions and floor positions To develop a routine of feeling loose and comfortable when you go to the piano Plus, because you can do these warm-ups anywhere and anytime, you can start before you get to your piano. Releasing tension and releasing your muscles The basic pattern of tension and release is fundamental to music making, both in the physical process of playing and in the music itself. Playing the piano involves a wide range of movement, from pressing down a key with your fingertip to using your entire upper body in playing scales, arpeggios, and chords. Add in pedaling and you’re using your whole body. All this movement requires muscle flexion, extension, and rotation; and movement is enhanced by a fluid, relaxed approach that’s unhindered by excess tension in your body. And because piano playing requires so much mental participation along with this physical movement, it’s easy to overlook the buildup of tension: gripping in the neck, forearms, and jaw; hunching in the shoulders; and locking the joints in the fingers. REMEMBER These common manifestations of physical tension can easily become incorporated into your playing through the necessary repetition of practicing. So developing a pattern of releasing your muscles as you play and building this pattern into your playing are very important. Doing this also becomes a way to unify the physical and mental components of music making, because staying comfortable while you play requires constant monitoring for areas of discomfort. Breathing in an unending circle Breathing is the model for fluid motion. Think of breathing in an unending circle – the end of an inhalation is the beginning of an exhalation. When you play the piano you want to think of the music, your body, and your mind as part of this constant, fluid motion. To create the smoothest, most luxurious breathing cycle you can imagine, follow these steps: 1. Stand with your shoulders and arms relaxed at your side as you develop this slow cycle of inhalation and exhalation. 2. Inhale through your nose slowly and evenly, deeply filling your lungs over a smooth arc of time. 3. Turn the inhalation into an exhalation without holding your breath, like a swimmer reverses direction in a pool, always in motion. 4. Exhale fully, without pushing, and let go of all the air until you’re ready to begin another inhalation. 5. As you develop this slow cycle, let all your muscles relax and let go in the same rhythm. Allow the breath to widen your upper body, back, shoulders, and neck so that you feel as if you’re loosening and lengthening throughout your body. Massaging, stretching, and contracting your hands Give all your joints, muscles, and bones in one hand a gentle massage with the other hand (see Figure 1-1). Squeeze, rub, stretch – do whatever feels soothing. Start with your wrist bones and work toward the fingertips, thoroughly massaging the top, sides, and bottom of your hand, and then switch to the other hand. Follow these steps for an effective hand stretch: 1. Spread your fingers into a comfortably wide span, palms down. 2. Contract your hand, bringing your thumb all the way under your pinky so you make an “X” with the thumb and pinky under the other fingers, as shown in Figure 1-2. 3. Spread your fingers into a wide span again. 4. Contract your hand, making the “X” with your pinky under your thumb, releasing all the way back along the finger joints to the wrist. 5. Repeat this exercise a few times, and then try it with your thumb crossing under and then over your fourth, third, and second fingers. Continue your warm-up by contracting your hand: 1. Make a tight fist and wrap your thumb across the outside of fingers two through five (see Figure 1-3). 2. Expand all your fingers, with space between each finger in a comfortable stretch. 3. Close your fist again, this time with the thumb tucked inside fingers two through five. 4. Repeat with both hands, alternating the thumb position. Warming up your wrists Give your wrists a warm-up by following these steps: 1. Hold your hands in front of you, palms facing away, as if to signal “stop” with both hands (see Figure 1-4). 2. With a loose wrist, slowly circle your hands both clockwise and counterclockwise. 3. Bring your hands together in front of you like you’re praying, palm-to-palm, finger-to-finger, and extend your elbows out to the side. 4. Slowly rotate your wrists so that your fingers point toward you, and then away from you, and finally down to the ground, as shown in Figure 1-5. 5. Repeat a few times as you loosen your wrists. Swinging and twisting your arms Try this exercise and then enjoy the looseness you feel throughout your arms: 1. Swing your forearms up from your elbows to the side to touch your thumb to your shoulder (see Figure 1-6a). 2. Let your forearms swing down gently, the momentum extending your arms out behind you but without reaching back (see Figure 1-6b). To continue stretching your arms, follow these steps: 1. Stand facing a wall, at an arm’s length away. 2. Reach both arms straight to the wall, at eye level, and put your hands on the wall, fingers pointing up, feeling your entire palm and all fingers firmly against the wall (see Figure 1-7). 3. Extend your arms to their fullest extension by taking tiny steps backward. 4. Relax and let your arms rest at your side. 5. Repeat this stretch, but with the fingers of both hands pointing in toward each other, and then pointing out to the side, and then pointing down to the floor. Finish your arm stretches with this exercise: 1. Stand perpendicular to a wall with your right side closest to the wall, at arm’s length. 2. Reach your right arm straight out to the wall and put your hand flat against the wall, fingers pointing up. 3. Slowly and gently look left as you extend your right arm into the wall (see Figure 1-8). 4. Use your left hand to massage the tight areas around your right shoulder and clavicle. 5. Repeat on the other side. Stretching your shoulders and neck To stretch your shoulders and neck, follow these steps: 1. Stand with your head in a neutral position and your hands at your sides. 2. Hunch your shoulders (see Figure 1-9) straight up to chin level, and then release down. 3. Circle your shoulders front to back, and back to front as you hunch and release. Work on this shoulder and neck warm-up next: 1. Reach your right hand up and behind your right shoulder to touch the shoulder blade on your right side. 2. Bring your left hand behind your back at the waistline, and reach up to touch your right hand. If you can’t reach, try dangling a strap, belt, or some other suitable extension so your left hand can grab on (see Figure 1-10). 3. Repeat these steps with your hands reversed. To continue your shoulder and neck stretches, follow these steps: 1. Grab the top of your head with your right hand and touch the top of your left shoulder with your left hand. 2. As shown in Figure 1-11, use your right hand to gently guide your head down to the right, toward your right shoulder. 3. At the same time, gently pull down on your left shoulder with your left hand, giving your neck muscles a nice stretch. 4. Repeat the stretch on the opposite side. REMEMBER Keep your stretches in sync with your breathing; your movement should be relaxed and flowing, not stiff and rigid. Working on your back The following exercise will stretch your back: 1. Stand with your feet just a few inches apart, fold your arms in front of you, and cup each elbow with the opposite hand. 2. Looking down to the floor, bend your knees and squat down, and let your elbows reach toward the floor in front of your feet. 3. Lower your head forward so you’re looking at your knees and your back is nicely rounded (see Figure 1-12). 4. Slowly rise up, still holding your elbows and bringing your arms up above your head to reach, lengthen, stretch, and widen your back. TIP If you want to do more back stretches, I recommend two yoga poses that are excellent for your back: Cat Pose and Child’s Pose. For more on these and other poses, check out Yoga For Dummies, by Georg Feuerstein, Larry Payne, and Lilias Folan (Wiley). Stretching your hamstrings Sitting can be a lot of work! Tight hamstrings can make it difficult for you to sit at the piano because the tight muscles pull down on the back of the pelvis, which means you have to do a lot of work to get your upper body balanced on your sitting bones. (You’ll read more about this in the next section.) So stretch those hamstrings, too, by following these steps: 1. Keep your legs and back straight as you stand and bend at the waist. 2. Reach with your arms to the floor to stretch your hamstrings. If you can’t reach the floor, reach down to a piano bench or low table placed in front of you (see Figure 1-13). Perfecting Practice with Proper Posture Start with a common-sense approach to your posture: Aim to situate yourself comfortably in a stable, balanced position so you can play and read music, with room to move freely. The trouble is, piano players can get so caught up in the complication of notes, clefs, fingering, rhythms, and dynamics that they often forget about their bodies. So a reminder to monitor your comfort level and make appropriate adjustments is always a good thing. Sitting at the piano: Height and angle If you’re too close to the piano, you cramp up your arms and scrunch your shoulders. If you’re too far away, you overreach, putting stress on those parts (the neck, upper arm, and pelvic support) that have to work to support your overextended parts. You want to feel comfortably loose, with enough room to move freely and enough support to feel light and long in the upper body and head. You should be able to move easily in either direction of the keyboard, just enough to follow and support your arms when they venture away from the middle to the high or low registers. Check that your bench or chair is the right height. A common way to measure this is by seeing that your elbows are even with the height of the keyboard when you’re sitting at the piano with your hands in playing position. You should see a slight arc from the elbow to the top of your wrist and back down your hand to the keyboard. You have a big advantage if you use an adjustable bench or chair (available on the Web at places like www.cpsimports.com and www.pianobench.com). The benches that come with most pianos aren’t a comfortable height for many people. If you don’t want to buy an adjustable chair or bench, a typical kitchen chair is a good alternative. Good posture is all about support. Think about building support from the ground up: 1. With the floor and the bench or chair providing your support base, align your body so your torso, shoulders, neck, and head are fully supported from underneath. 2. With both feet on the floor, and with your knees directly above your feet, sit evenly on your sitting bones so you feel a strong, stable support for your upper body. 3. Don’t let your weight fall back; bring the back of your pelvis (your hip bones on the sides and sacrum in the back) up above the sitting bones, and continue this line of support up through your spine to the top of your head. Your spine has four curves; it takes careful awareness and support in both the front and back to balance and feel centered throughout your upper body. 4. Keep your head supported above your spine; don’t let it drop or lean in any direction. If you’re hunching, slouching, or leaning, you’re going to have to use your muscles and energy to compensate for the imbalance. 5. Release your shoulders if they’re holding any tension, and let your arms hang to the side. 6. As you breathe in, feel the full length of your upper body from the sitting bones to the top of your head. 7. Breathe out and feel a relaxed, stable balance throughout your body. Getting a handle on proper hand position Your hands should feel supported by your shoulders and arms, balanced and relaxed so they can move as easily as possible. Your wrist should be high enough that your fingers make a slightly curved shape with the fingertips on the keys, but not so high that you restrict movement. You should see a rounded shape created by the soft, relaxed undersides of your fingers and palm, similar to the shape of your hand draped around the fist of the other hand, as shown in Figure 1-14. As you move up and down the keyboard, try to keep this shape and feeling, with a minimum of twisting at the wrist. Hands on the fallboard: Counting out loud and bouncing Close the fallboard over the piano keys, and place your hands in playing position, as I describe in the previous section. With your fingertips touching the top of the fallboard, count out a steady, moderate, four-beat pattern of eighth notes, “one, and, two, and, three, and, four, and …” (see Figure 1-15). With a smooth motion, lightly bounce your wrists down on the beats and back up on the “ands” between the beats. You’re creating a model for playing the piano in tempo; remember this model when you play the exercises in this book and any other music. You’re counting and moving with the beat, your wrists are free and loose, and your fingers are in a nice, rounded shape. Incorporate this model into your fluid motion cycle, reading music and playing the piano in the motion of tempo and the musical phrase. The combination of reading music, counting, and playing on the keyboard in a steady, continuous tempo may sound complex, but it’s easier and more musical when you incorporate all the elements into one activity. Hands on the fallboard: Hand arches and finger drops The next exercise gives you practice switching comfortably from a contracted, arched hand position to an open hand position with your fingers loosely extended. To do the exercise, follow these steps: 1. Let your hands rest, palms down, on top of the fallboard. 2. Raise your wrists as you touch your fingertips together in a point, fingers extended and still touching the wood (see Figure 1-16). 3. Spread your fingers and let your wrists drop easily until your palms are on the fallboard again. 4. Repeat several times. (Continues…) Excerpted from Piano Exercises For Dummiesby David Pearl Copyright © 2009 by David Pearl. Excerpted by permission. All rights reserved. No part of this excerpt may be reproduced or reprinted without permission in writing from the publisher.Excerpts are provided by Dial-A-Book Inc. solely for the personal use of visitors to this web site. Read more
Reviews from Amazon users which were colected at the time this book was published on the website:
⭐I’m thrilled with the variety of exercises, and pleased that it came with a CD, as I’m self-taught. There is only one thing that I think should have been done better: the exercises are printed too small for comfort. Two exercises on one page means the print is not as clear as it should be. One exercise per page would have been a lot better – and no, I don’t need glasses, and can read any other music books. Also, the binding is so tight that it makes it difficult to keep the book open on the piano. I heard other people complaining of the same difficulty and solving it by cutting each page out and putting in a ring binder. I’ll do that too.Overall, a good product.
⭐Nice exercises. The music is too small to be read from the book, so I retype them in Musescore.
⭐Book is great but titles of exercises on dvd are in German. Why?
⭐Excelentes ejercicios
⭐Not found.
⭐Common sense resource for daily practice, very satisfied with this purchase
⭐Piano Exercises For Dummies by David Pearl is a gem and a resource for anyone playing piano. A glance is not enough. Once you engage, you get a depth of understanding. David’s exercises are fun and interesting. He comments and relates the work to famous compositions and musicians while explaining the benefit of the exercise very simply. The work enhances my understanding of music and develops my technical skill at the same time. I have been looking for this approach for a long time and no other book comes close. This summer, even without a teacher, with this book I will be able to develop musically and increase my technique. I highly recommend it. Thank you David!
⭐This book and accompanying DVD provide all that is required to become a better piano player. All I have to do now is find the time to study the lessons and apply what is being provided.
⭐This book is exactly what I was looking for. I’ve purchased so many books only to find them too simple–beginners–or too complex for me. “Exercises” has given me the work I wanted and the challenges–just right–that I wanted. Of all the books on piano playing I’ve purchased I recommend this one and “The Piano Handbook” by Humphries as the two best. These books are great for intermediate to more advanced students who want to improve.
⭐Before I bought this, I looked for reviews from people who had bought the kindle version to see how well it had been converted, but there were none, so I hope this fills that niche.The text and line-drawings come out well. The contents is active, and the hyperlinks work. The music is well reproduced, but as noted for the paper version, it is too small. I was using an mini ipad, which is a similar size to a kindle fire, and with the screen rotated and the music zoomed, it is just possible [but tiring] to read the music, but I have to peer in to see the fingering. For the shorter exercises one might learn off by heart anyway, that isn’t so bad, but for the longer pieces, it is a pain. Thinking the screen size might be the limiting factor, I tried it on my husband’s nexus 10, but the music does not zoom to any bigger.The book and exercises themselves are good, but not special enough to make it worth the extra effort; so I bought a book of studies [on paper] instead. More clutter, but less strain on the eyes!
⭐The usual fluff and filler stuff but some decent exercises. What puzzles me is why have giant and silly line drawings of a relaxed hand and fingers, and then all the exercises have tiny diagramming. Don’t expect to put this on your piano or keyboard music stand and play it… it is far too small to see. Th fingering numbers are ridiculously tiny. Will probably return this as I don’t think it is really suitable for its purpose. Sum up, good exercises very poorly presented.
⭐Like many people I leant to play the piano as a young lad and gave up when other interests took precedence ( i.e. girls ). Now that my children are older I want to improve my skills, play less wrong notes and move on to play more technically demanding music. This book is what I have been looking for over the past few years although I did not know it existed. I could not find a book that “taught” you how to improve.Each chapter of the book sets a top level skill to achieve and then utilises numerous exercises to work though to improve that skill. Every finger is taught what is expected of it via exercises that focus on specific finger groups. Like all the Dummy series books you can dip in and out of the chapters and work on whatever you want.This is not a book for those new to the piano or music theory, but for those comfortable with reading music, using the keyboard and being able to constructively work to improve.In summary, it is a great, brilliant, fantastic book that I would recommend to anyone looking to improve on their technical skills. I can see that I will have hours of fun with it and that it will be useful for many years to come.
⭐Helpful to a point but the actual exercises are printed a bit too small. There is nothing wrong with my eyesight but I found the fingering almost impossible to read sitting at my completely normal upright piano.The book is aimed at the American market so British readers will need to get used to “quarter notes”, “sixteenth notes” and so on.
⭐The first page says that an assumption is made that you are able to read music. I wanted something to get me started, this is not that.It is far more complicated than that and should say so in the title.
Keywords
Free Download Piano Exercises For Dummies in PDF format
Piano Exercises For Dummies PDF Free Download
Download Piano Exercises For Dummies 2008 PDF Free
Piano Exercises For Dummies 2008 PDF Free Download
Download Piano Exercises For Dummies PDF
Free Download Ebook Piano Exercises For Dummies